
What Basic Studio Equipment Costs and What Drives the Price
Ingrid Haugen
6 min read
A plain look at what tripods, lenses, monitors and light stands cost in a small studio, and which details push the price up while adding little for learners.
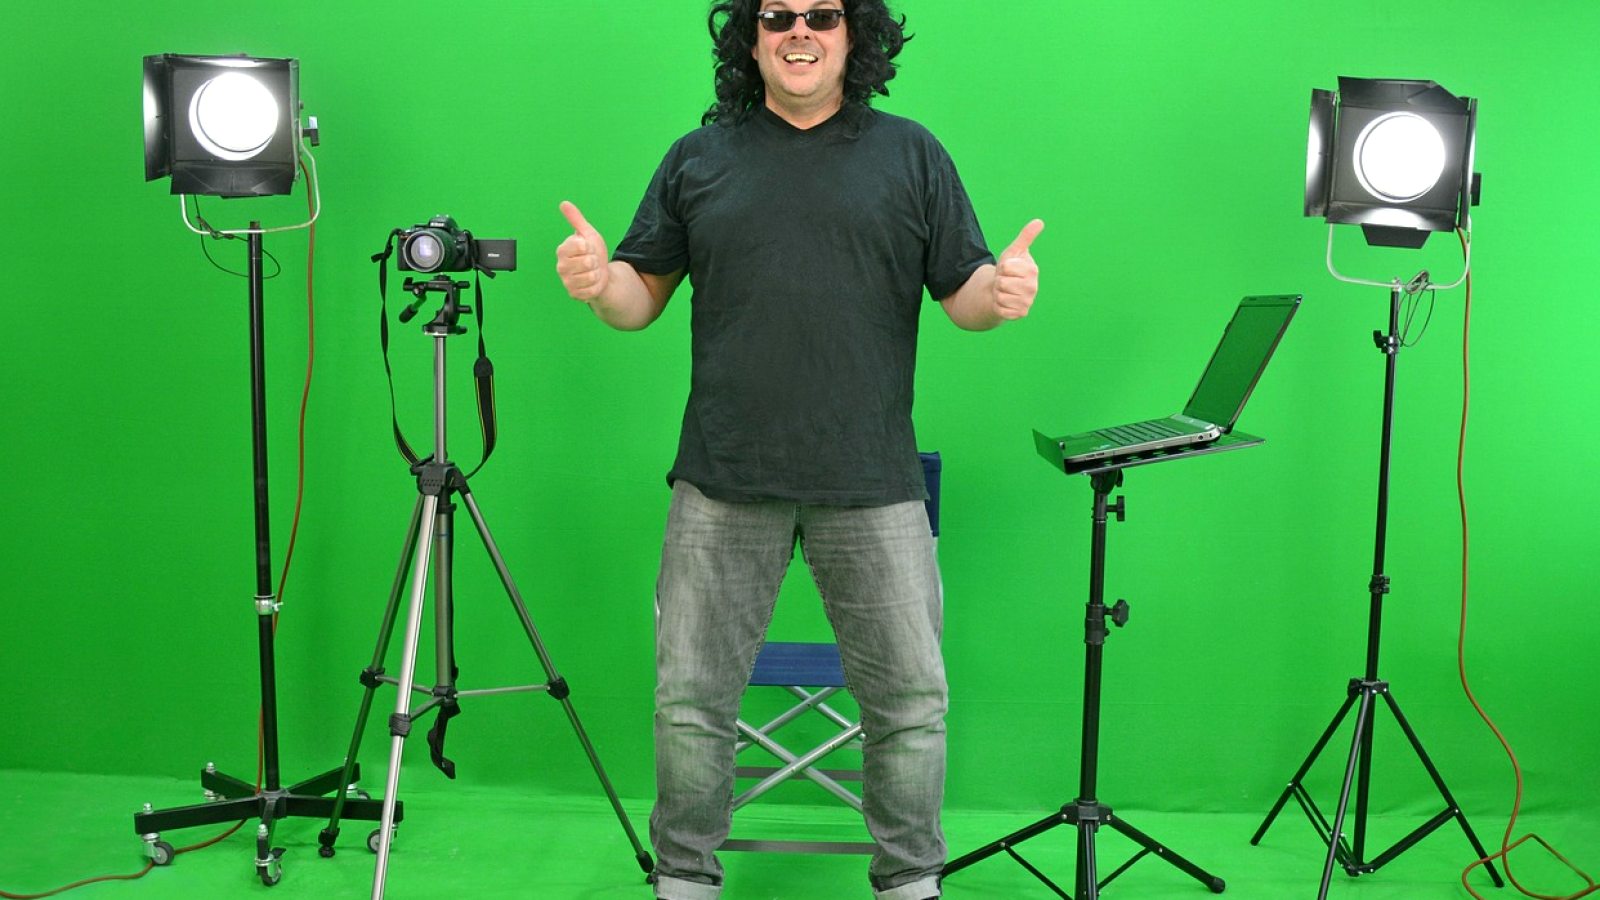
Start with the job, not the price list
When people ask me what a small studio setup costs, I answer with a question: what will you record, and how often? A person filming one interview a month at a kitchen table needs a very different kit from someone recording every week in a spare room. Price follows the job, and a list of prices without the job behind it only creates worry.
In these autumn weeks, when many adults decide to set up something at home before the dark months, the same pattern repeats. They look at a monitor, a lens and a tripod, add up the highest numbers, and conclude that the hobby is out of reach. Usually it is not. Most of the cost sits in a few choices, and those can be made calmly, one at a time.
This article belongs to our Equipment Basics material. It does not recommend products. It explains what each part does in a small studio and why two items that look alike can differ a lot in price, so you can decide what to pay for.
Tripods: where the money goes
A tripod is the part people underestimate most. The price is driven by three things: how much weight the legs can hold without sagging, how smoothly the head pans and tilts, and what the legs are made of. Heavier metal legs are cheaper and steadier but tiresome to carry. Lighter materials cost more and only matter if you move around a lot.
For studio work, the head matters more than the legs. A head that jerks when you start a slow pan will ruin a shot no matter how good the camera is. Smooth, damped movement is what you are paying for, and it is worth testing in a shop by moving it slowly with your whole hand rather than a fingertip.
A common mistake is buying a tripod rated exactly for your camera's weight. Leave a margin, because a monitor, a cage or a microphone adds load. A tripod that is a little over-specified costs somewhat more, but it removes the small drift that makes framing exercises frustrating.
- Check the load rating against your camera plus accessories
- Test pan and tilt slowly before buying
- Pay for a smooth head before pay for lighter legs
Lenses: focal length is only part of the bill
Lens prices climb for reasons that have little to do with what a beginner sees on screen. A wider maximum aperture lets in more light and gives a softer background, and it costs noticeably more as the opening gets larger. Build quality, quiet focus motors and a zoom range that stays sharp throughout add further steps.
For the portrait and interview framing we teach, a single fixed focal length in the middle range often does the job. A fixed lens is usually cheaper than a zoom of similar quality, and it makes you move the camera and think about distance, which is a useful habit when practising composition.
Before paying for a faster lens, ask whether your room is bright enough that you will ever use the widest opening. In a small, evenly lit studio you will often close the aperture for sharper faces anyway. The extra stops then sit unused while the price remains.
Monitors and light stands: modest parts, wide price range
A small external monitor helps you judge focus and exposure better than the camera's own screen. What raises the price is brightness, colour accuracy and extra tools such as waveform displays. For learning, a clear image and a reliable focus aid are enough. You can practise reading exposure with the tools you already have before paying for more.
Light stands look like the dullest purchase, yet they reward care. A stand that wobbles or slowly sinks under a softbox is a nuisance and a risk to the equipment. Sturdy bases, a locking collar that holds, and a weight bag cost little more than a flimsy stand and prevent most accidents.
Lighting units themselves vary most. Output, colour consistency and the ability to dim smoothly account for the price. If your room has a window, start with one good light and a stand, and add a second only when an exercise shows you what is missing.
- Choose a clear monitor with a dependable focus aid
- Pick stands that lock firmly and take a weight bag
- Add a second light only when an exercise calls for it
What drives the price without helping you learn
Some costs buy comfort or appearance rather than skill. Brand reputation, a finish that looks professional, large bundles with accessories you will not touch, and features aimed at long location shoots all raise prices. None of them makes your framing better or your exposure more accurate.
Bundles deserve special caution. A kit that includes a bag, a spare battery, three filters and a cleaning set can look generous, but if you need only the camera support and one lens, you are paying for the rest. Buy the parts the exercises need and add the others later if a real gap appears.
Second-hand equipment is another way to lower the cost, particularly for stands and tripods, which age slowly. Check that every lock holds, that no leg is bent, and that the head moves smoothly through its full range. Used lenses need a closer look for scratches and fungus inside the glass.
A sensible order to buy in
If I were starting a small studio from nothing, I would spend first on a sturdy tripod with a smooth head, because every other exercise depends on a steady camera. Second would be one lens in a focal length suited to your usual subject, and third a single controllable light with a proper stand.
A monitor comes next, once you can already tell from the camera screen what you are missing. Buying it earlier tends to give you a larger picture of the same mistakes. After that, add small things like clamps, a weight bag and cable ties, which cost little and make the room tidier and safer.
Spreading purchases over several months also spreads the cost, and it lets you learn what each item does before the next arrives. Our practical exercises are written so they work with modest equipment, which means you never need to buy ahead of your skill.
- Tripod and head first
- One lens suited to your usual subject
- One controllable light and a stand
- Monitor once the camera screen limits you
The price of studio equipment is driven by weight capacity, smoothness, aperture, brightness and build quality, and only some of those matter while you are learning. Decide what you will record, buy the steady parts first, and leave the extras until an exercise shows a real need. A modest, well-chosen kit teaches more than an expensive one bought in a hurry.
Keep reading
-
A Checklist to Work Through Before You Choose a Camera Guide
Before you commit to reading or following any written camera guide, these checks help you judge whether it covers focal length, exposure, focus and monitor reading clearly enough to be useful.
-
Planning Your Autumn Composition Practice: Framing Work for the Darker Months
As daylight shortens, indoor portrait and interview framing becomes the most useful thing to practise. A seasonal plan for headroom, depth and shot planning across the coming weeks.