
Five Framing Mistakes in Portrait Setups and How to Fix Them
Magnus Berg
6 min read
Most weak portrait and interview frames come from a handful of repeat habits. Magnus Berg walks through five common mistakes from our composition courses and shows a simple correction for each.
Mistake one: too much or too little headroom
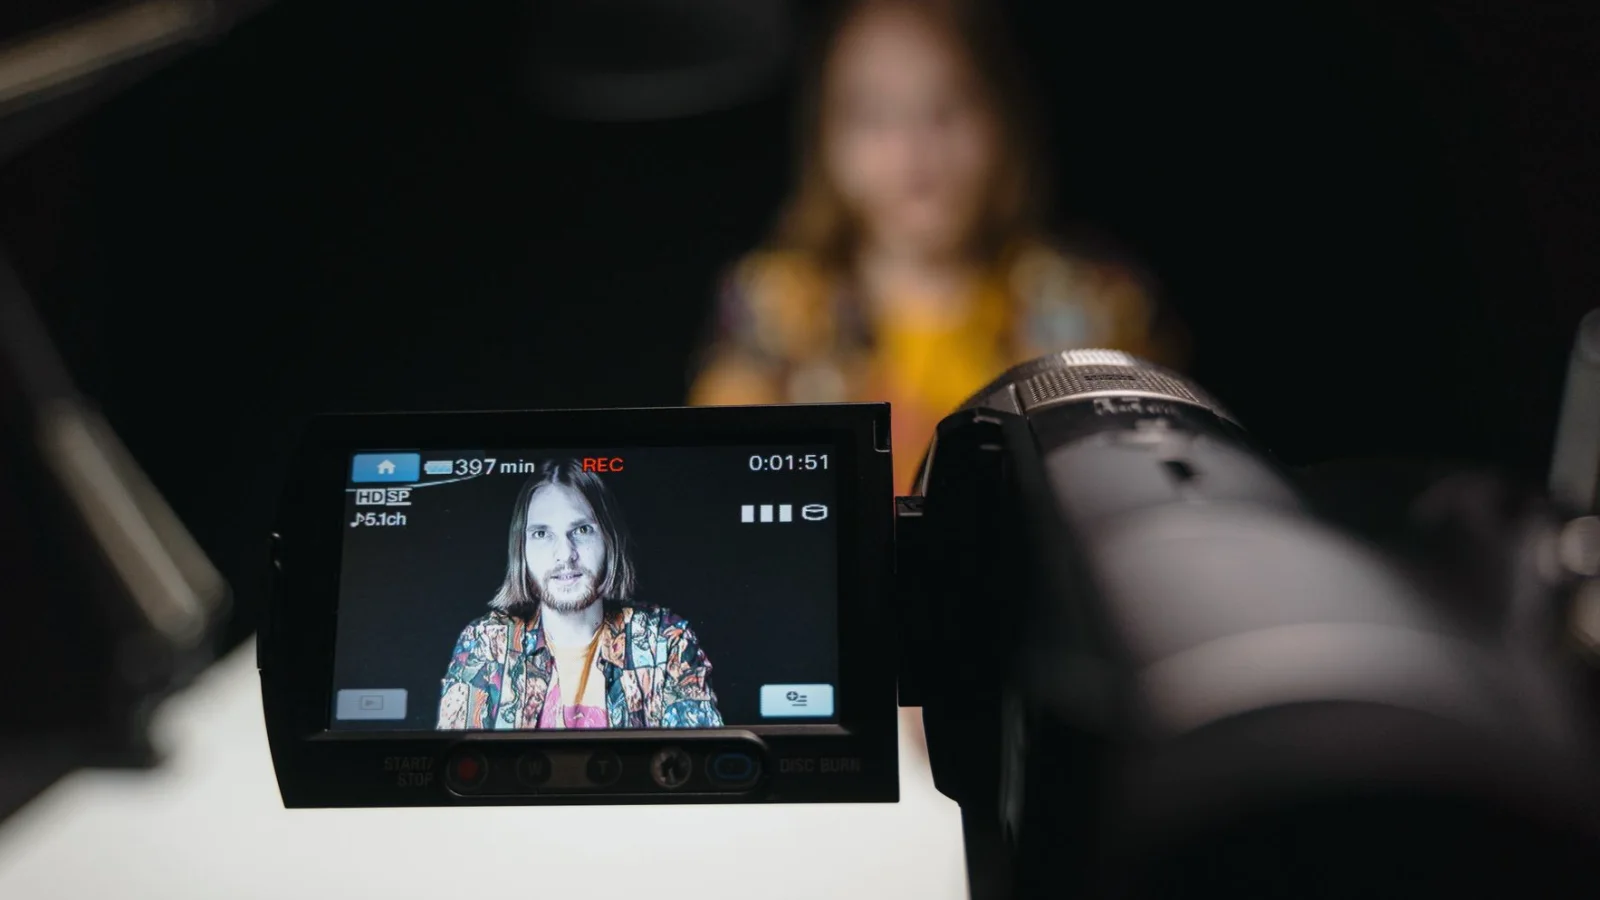
The first thing I see in learners' exercise frames is headroom that has drifted. Either the subject's head is crowded against the top edge, or a wide band of empty wall sits above it and the person seems to sink into the bottom of the picture. Both come from framing the frame while looking at the face rather than at the whole rectangle.
A workable starting point is to place the eyes roughly a third of the way down from the top edge, then check the gap above the hair. It should be small but clearly visible. When the subject sits up straighter after a few minutes, the gap changes, so look again before recording rather than trusting the first setup.
In the composition courses we use a simple habit here: freeze the frame, glance at the four edges one at a time, and only then judge the face. It takes a few seconds and catches most headroom problems before a single take is wasted.
- Eyes about a third from the top as a starting point
- Leave a visible but small gap above the hair
- Recheck after the subject settles into the chair
Mistake two: centring everything out of habit
Centring a subject is not wrong, but it is often a default rather than a decision. In interview setups it tends to produce a flat, symmetrical frame where the person and the background compete for equal attention, and nothing tells the viewer where to look.
The rule of thirds helps because it forces a choice. Place the subject on one vertical line and let their gaze or posture turn slightly toward the larger open space. That open space is called looking room, and it makes the frame feel balanced instead of cramped.
Treat the grid as a tool for testing, not a law. If a centred frame is deliberate, for example a formal address to camera with a symmetrical backdrop, keep it and make the symmetry exact. Half-centred, slightly off frames are the ones that look like mistakes.
- Offset the subject and leave looking room in the gaze direction
- If you centre, make the symmetry exact and intentional
Mistake three: ignoring depth behind the subject
A person standing a hand's width from a wall looks pasted onto it. Learners often spend their effort on the face and forget that the space behind carries as much of the picture's feel as the subject does.
Move the subject forward, away from the background, even by a metre or so in a small room. This creates separation, lets the background fall softer, and gives light a chance to treat the two planes differently. If the room is too small, reduce clutter instead: one lamp, one plant or one shelf is enough to suggest depth without pulling the eye.
Check the line where the head meets the background. Poles, door frames and picture corners that seem to grow out of a shoulder or skull are easy to miss on a small monitor and hard to remove later.
- Pull the subject away from the wall where space allows
- Watch for objects that appear to sprout from the head
Mistake four: choosing the shot size by accident
Shot size, meaning how much of the person you show, is a choice that learners frequently leave to wherever the tripod happened to land. A frame cut at the elbow, the knee or the neck feels awkward because it slices through a joint.
Aim to cut between joints, for example at mid-chest or just below the waist, so the edge of the frame reads as a natural stopping point. Decide on a size for the whole interview and stay with it unless there is a reason to change.
This is also where shot planning pays off. Write down the sizes you intend, wide, medium and close, before recording. A short list on paper prevents the drift that comes from nudging the camera between answers and ending up with footage that cannot be cut together.
- Cut between joints, not through them
- Write the planned shot sizes down before you roll
Mistake five: framing without checking the monitor properly
The last mistake sits between composition and setup. Learners frame carefully on a tiny camera screen in bright light, then find on a larger monitor that the edges were soft, the subject tilted or the corners cluttered.
Frame on the biggest screen you have and view it in the lighting you will record in. Look at the corners first, since that is where stray objects hide. Then check that horizontal lines such as shelves or window frames are level, because a slight tilt becomes obvious once it is pointed out.
Do a short test recording and play it back before the subject arrives or settles. Two minutes of review beats an hour of regret, and it is the one habit that makes every other correction on this list stick.
- Frame on the largest monitor available
- Check corners and horizon lines before recording
- Play back a short test take
Putting the fixes into one routine
None of these mistakes is dramatic alone. Together they separate frames that feel considered from frames that feel accidental, and the cure is a routine rather than extra equipment.
Before each recording I suggest a fixed order: set shot size, place the subject with looking room, create distance from the background, adjust headroom, then review on the monitor. Running through the same sequence every time turns good framing into habit.
Repeat the routine on cheap, low-stakes subjects, a colleague at a desk or a friend in a kitchen, until it needs no thought. The composition courses build exactly this repetition, with exercises you can run again at home whenever you like.
Good framing rarely comes from a clever trick. It comes from small decisions made on purpose: headroom, placement, depth, shot size and a proper look at the monitor. Fix one mistake at a time, record a short test, and compare it with your earlier frames. Late summer light makes a fine moment to practise by a window, and the habit will carry into any studio you set up later.
Keep reading
-

Tripod, Lens, Monitor and Light Stand: What Each Does in a Small Studio
A practical walk through the four pieces of equipment most small studios start with, what each one is for, and how to set them up in a sensible order before you record.
-

The Tools Behind a Reliable Studio Setup Checklist
A look at the paper, markers and small instruments we use to build the pre-recording checklists, and why a good checklist depends more on its method than on its length.
-
How to Frame a Portrait or Interview Shot, Step by Step
A practical walk through headroom, the rule of thirds and depth for a seated portrait or interview, with a short routine you can repeat before every recording in the darker months.