
How to Frame a Portrait or Interview Shot, Step by Step
Henrik Solberg
7 min read
A practical walk through headroom, the rule of thirds and depth for a seated portrait or interview, with a short routine you can repeat before every recording in the darker months.
Start with the question the shot must answer
Before touching the camera, decide what the viewer should notice first. In a portrait that is usually the eyes and the expression; in an interview it is the person speaking and a calm sense of the room around them. Framing is a set of choices made in service of that one answer, and most weak shots come from skipping this step and adjusting the tripod at random.
In our courses we ask students to write one sentence about the shot before setting anything up: who is in it, what they are doing and what should feel important. It sounds almost too simple, but it gives every later decision something to be measured against. If a change does not help the sentence, leave it alone.
Early winter is a good time to practise this. Daylight is short and low, so you are likely to be working indoors with a single window or a small lamp, which makes the framing choices easier to see and compare.
- Write one sentence describing the shot
- Name the subject and what should draw the eye
- Decide portrait or interview before choosing the lens
Place the subject using the rule of thirds
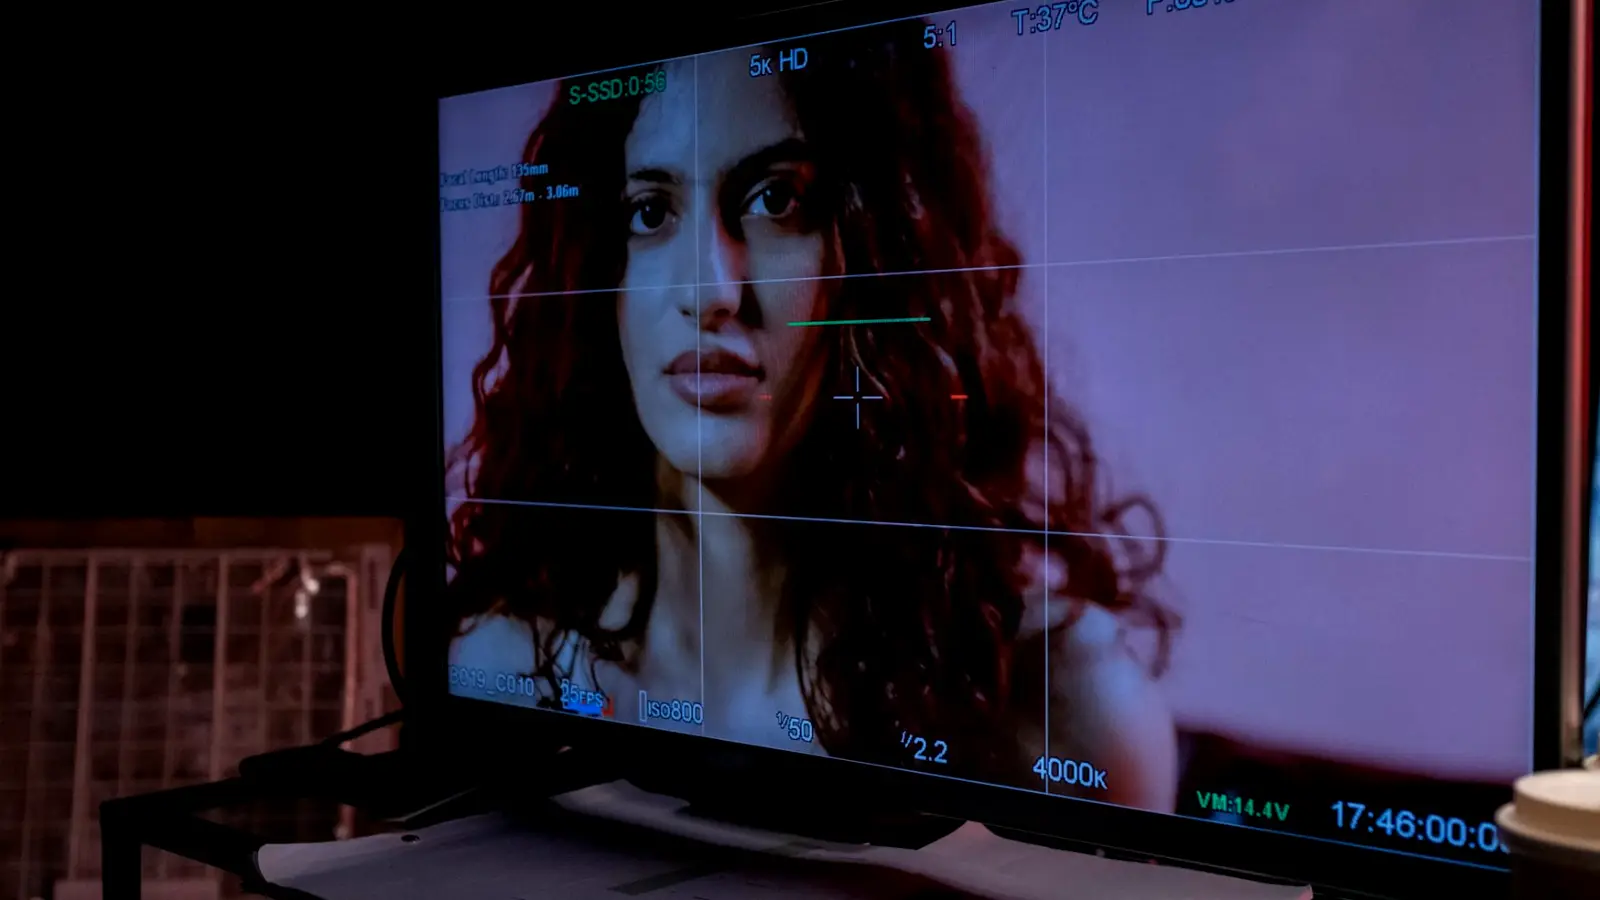
Imagine the frame divided into three equal columns and three equal rows. For a portrait, place the subject's nearer eye roughly on the upper horizontal line rather than in the dead centre. For an interview, place the person on one of the vertical lines and let them look slightly toward the larger empty side, which gives the face somewhere to look into.
This is a starting point, not a law. A centred, symmetrical frame can suit a formal statement to camera, and some rooms simply look better with the person nearer the middle. What matters is that your placement is a decision you can explain, and that you check it on the monitor instead of trusting the viewfinder alone.
Turn on a grid overlay if your camera or monitor offers one. It costs nothing and lets you see at once whether the eye line sits where you meant it to, and whether the horizon or door frame behind the subject is level.
- Nearer eye on the upper third line for portraits
- Interview subject on a vertical line, looking into space
- Use a grid overlay and confirm on the monitor
Get headroom right without cutting the head
Headroom is the space between the top of the head and the top of the frame. Too much and the person seems to sink; too little and the frame feels cramped, as if the picture were pressing down on them. A useful starting point is to leave a gap of roughly one hand's width at arm's length on the monitor, then adjust by eye.
Watch the bottom of the frame as well. Cropping at a natural point, such as mid-chest, reads as deliberate, while cutting through the neck, elbows or knees feels accidental. When a speaker leans forward or gestures, the head moves, so frame for the whole range of movement and not only for the first second.
Always check headroom after the person has settled into the chair. People sit taller when you set up the shot and slump after a few minutes, and the framing that looked right at the start can drift out of balance.
- Leave a modest gap above the head, then adjust by eye
- Crop at mid-chest or waist, never at joints
- Recheck once the person has settled into the seat
Build depth so the person does not sit flat on the wall
A subject placed directly against a wall looks flat, however good the framing is. Move the chair a metre or two forward and let the background sit further back. With a longer focal length and a wider aperture, that distance also softens the background, which separates the person from the room without extra equipment.
Layers help too. A bookshelf, a plant or a lamp in the mid-ground gives the eye something to travel across, but keep them quiet and away from the head so nothing seems to grow out of the shoulder. Check the monitor for bright spots, since a window or a lit screen behind the person will pull attention away from the face.
In a small room you will not always get much distance. In that case, angle the chair slightly and shoot along the length of the room, which gives more apparent depth than shooting straight at the nearest wall.
- Pull the subject away from the wall
- Add one or two quiet objects in the mid-ground
- Avoid bright windows or screens behind the head
Choose a lens and distance that flatter the face
Wide lenses used close to the face stretch the nose and widen the forehead, while moderate telephoto lengths used from further away look more natural. For a seated portrait, a focal length in the mid range with the camera a few metres from the subject is a comfortable and forgiving place to begin. In a tight room you may have to compromise, and that is fine as long as you notice the effect on the monitor.
Set the camera at about eye height, or very slightly above, and keep it level. A camera tilted up toward the chin or pointing steeply down makes a person look either imposing or small, which is rarely the intention in an interview.
Lock the tripod head once you are happy and tighten every knob. A frame that creeps a few degrees during a long recording is one of the most common and most avoidable problems we see in student work.
- Mid-range focal length from a few metres away
- Camera at eye height and level
- Lock the tripod head before recording
A short routine to repeat before each recording
Put the steps together as a routine you can run in a few minutes. Write the one-sentence goal, place the subject on a third, set headroom, build some distance to the background, choose the lens and distance, then lock the head and confirm everything on the monitor. Do it in the same order each time so nothing gets skipped when you are tired or rushed.
Record ten seconds and play it back on the monitor rather than on the small screen of the camera. Look at the edges of the frame first, then the face. Many framing faults are only visible when you look away from the subject and study the borders.
Keep a note of what you changed and why. After a handful of sessions you will see your own habits, such as always leaving too much headroom or placing people too close to the wall, and you can correct them on purpose.
- Goal, placement, headroom, depth, lens, lock
- Record ten seconds and review on the monitor
- Keep a short note of what you changed
Good framing is mostly a matter of making a few clear choices in a fixed order and then checking them on a proper monitor. You do not need new equipment to improve a portrait or an interview, only a routine that you repeat until it becomes habit. Try the steps this winter with a window and a single chair, and compare your first recording with your fifth.
Keep reading
-
What Basic Studio Equipment Costs and What Drives the Price
A plain look at what tripods, lenses, monitors and light stands cost in a small studio, and which details push the price up while adding little for learners.
-
What Should Be on a Studio Checklist Before You Press Record?
The question we hear most is simple: what actually belongs on a pre-recording checklist? Here is a short, honest answer covering camera, light, sound and monitor, in the order that saves time.